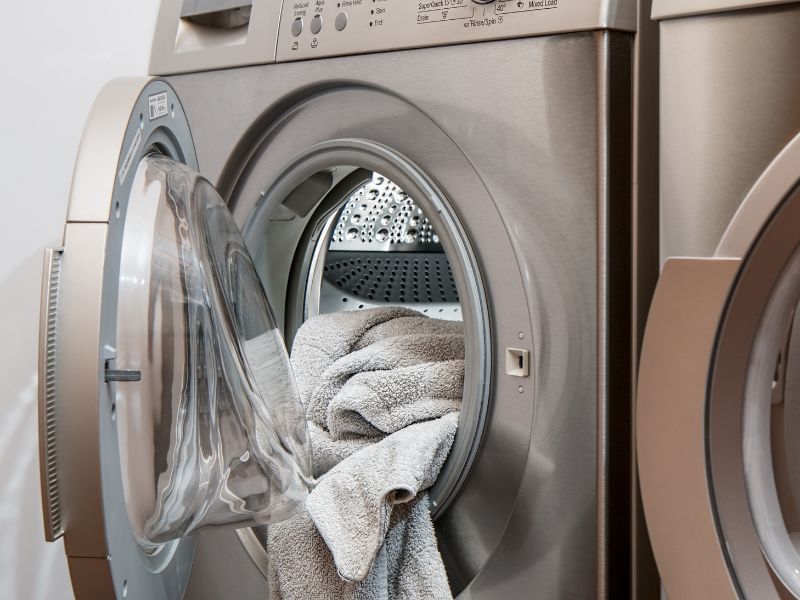
What Happens During a Professional Washer Repair Service?
TLDR: Washer repair involves a diagnosis phase where professionals inspect the machine’s condition and test various components to identify issues. The repair process includes assessing warranty status, ordering parts, using quality tools, and ensuring safe repairs. Quality control checks cover power, connections, cycles, and more. After repair, proper maintenance, like cleaning the lint trap and checking water hoses, is crucial for long-term washer health. Professionals may offer warranties for their work, and regular maintenance can prevent future issues.
The professional washer repair process can be broken down into several distinct stages, beginning with the diagnosis phase, in which a professional service technician assesses and diagnoses the exact problem. Additionally, it is important for professionals to use quality control checks to evaluate the current state of the washer, and to make sure the repair is as effective as possible. Finally, it is also important for customers to be aware of the post-repair tips they should follow in order to keep their washer functioning efficiently for a long time.
The Diagnosis Phase: How Professionals Look At Your Washer
The diagnosis phase is an integral part of figuring out what the problem is with a washer. Professionals look at a variety of factors in order to come to an accurate conclusion. Firstly, they are going to carefully examine the washer and note any visible signs of damage or normal wear and tear. They will then test the various working parts of the washer, both electronic and mechanical, in order to confirm or rule out any potential issues.
Next, professionals may examine the hoses of the washer to see if the water flow is functioning correctly. Furthermore, they may also check to make sure that the gaskets or seals of the washer are not damaged or worn out. Similarly, they may check the hoses and connections for any sign of leakage.
Professionals also use diagnostic tools in order to gather information on the inner workings of the washer. For instance, use of scanners or code readers in order to detect the current readings of the washer’s various parts. They may also use oscilloscopes to examine the electrical signals within the components of the washer. This helps in detecting whether there is an issue with the calibration or connection of any part.
The professionals also often request the history of the washer in order to determine if any repair or maintenance had been done in the past. On the other hand, this also helps them to check for any signs of wear and tear of the mechanical parts and evaluate the overall condition of the washer.
As a result of the various tests conducted, the professional will finally be able to determine the underlying issue and provide a diagnosis for the problem. Consequently, the professional may also provide a cost estimate for the repairs needed.
The Professional Washer Repair Process
The professional washer repair process can be a complex endeavour. Firstly, the technician must assess the damaged washer in order to determine the necessary work, providing details of the necessary repairs to the customer. They must order the necessary parts for repair, and depending on availability, may have to schedule a second appointment for the actual repair work.
In addition, the technician must verify the warranty status of the washer before beginning work. On the other hand, if the washer does not fall under the terms for repair, the technician must inform the customer of the appropriate steps to take and provide the necessary paperwork.
The technician should use quality tools that are approved for the brand of washer being repaired. Similarly, they should use parts that meet the exact standards of the manufacturer while ensuring the safety of all the electrical components.
Then, the technician must actually repair the damaged washer by assembling all the parts to their exact specifications. For instance, if the technician is replacing an internal component, they must properly check the motor connections and belt tension. As a result, the washer should be working correctly once repaired, and the technician must provide a post-repair check to ensure the customer is satisfied.
Consequently, the technician must provide advisement on proper maintenance and upkeep of the washer to prolong its lifespan. This includes recommending the proper detergents for use and cleaning out the dryer lint trap. Lastly, the customer will be provided with paperwork for a full record to prove the professional service and repair.
Quality Control Checks: What the Pros Look for On Your Washer
When it comes to quality control checks for a washer, professionals look for a few key indicators of quality and safety. The technician or inspector checks for issues with the washer’s power cord, plugs, or connections, the door or lid closure system, and general physical appearance. They may also inspect for any obstructions in the washer or leaks in the hoses and detergent dispenser.
On the other hand, the technician or inspector will also check for any issues with the correct installation and setup of the washer so that it operates correctly. This typically includes testing the operation of the spin and agitate cycles, checking for proper cycle and temperature selection, and testing the water level selection.
In addition, the technician will also pay close attention to any noise or vibration issues that may indicate a broken part or a misaligned machine. They may also check the drain valves, the motor, and the suspension rods to make sure that they all are connected and free from obstruction.
They will also check the general condition of the interior of the washer, the gasket and bellows, and any safety mechanisms that are included with the machine to make sure they are all in good working order. This includes any switches or soup containers used in the washing process.
Finally, the technician or inspector will also check the machine’s instructions to ensure that they are accurate and up to date. This includes double checking for cycle and temperature settings as well as any other features that the machine might have. As a result, it is important to ensure the washer functions and safety features are checked thoroughly to ensure the safety of the users.
Tips for Post-Repair Washer Maintenance
After you have finished a repair on your washer, it is important to take some extra steps to ensure the machine remains well maintained. Firstly, to prevent the buildup of lint and fabric softener residue, make sure to regularly clean the lint trap. For a deeper cleaning, it can be a good idea to mix a mild solution of laundry detergent and warm water and use a soft cloth to wipe down the inside surfaces of the washer. It is important to avoid overloading the washer by evenly distributing the load and selecting the appropriate washing cycle.
On the other hand, it is beneficial to remove the wet laundry from the washer promptly after your wash cycle is complete in order to prevent the clothes from developing mildew. Similarly, it is important to check your water supply hoses and replace them at least every 3-5 years to protect against rupture. In addition, be sure to regularly check the washer’s seals and gaskets for any signs of damage or cracking, as continued use could cause the machine to be less efficient.
Therefore, it is beneficial to clean the washer’s interior and exterior with a damp cloth or brush on a monthly basis and to use a cleaner specifically designed for the job. This will help to reduce the risk of corrosion or pitting. If there any noticeable chips, scratches, or rust on the machine’s metal parts, take the time to apply metal protectant. Doing so will help to protect the washer from further damage.
For instance, if you notice any strange noises coming from the washer, be sure to unplug the machine as soon as possible and check for any mechanical issues. As a result, this will help to ensure the machine operates in an efficient and reliable manner. Lastly, make sure to periodically check all settings to ensure the washer is running perfectly and not generating any extra power or money costs.
Final Thoughts
he entire process of washer repair, from diagnosis to professional repair, quality assurance, and maintenance, demands a keen focus on safety and precision. Technicians begin with a thorough diagnosis to pinpoint the issue affecting the machine’s functionality. Following this initial assessment, they proceed to the repair phase, conducting a series of tests to uncover the root cause. Quality control checks are subsequently performed to validate the correctness of the repair job. Furthermore, implementing preventative measures, including routine cleaning and inspections, becomes imperative to enhance the washer’s long-term efficiency. By diligently attending to these details and practicing proactive maintenance, washing machine owners can ensure their appliances perform optimally throughout their lifespan.
Frequently Asked Questions
What steps are involved in diagnosing washer problems?
1. Identify the symptoms: Start by identifying all the symptoms of the washer you’re troubleshooting. Make a list of any abnormal noise, leaks, draining or filling issues, vibration, or any other signs something may be wrong.
2. Check the plugs and cables: Make sure the washer’s plug is properly inserted into the wall outlet and all the cables are connected securely and that none are damaged.
3. Investigate the hoses: Always check the hoses that connect your washer to the water source as well as the drain. Check for any kinks or clogs and make sure they are securely attached.
4. Test the water flow: Try bypassing the hoses and run some water directly from the faucet to the washer to test the flow. If it works reliably with the direct hose line, the problem may be in the hoses.
5. Check the filter and washer drum: If the filter is clogged or there is a build-up of lint or other debris, it could impede the water flow or cause jamming in the washer drum. Carefully check the filter and clean it if necessary.
6. Check the drain pump: If you’re having issues with draining, the drain pump may be blocked or defective. Make sure it is free of any debris and then test the pump with a multimeter to determine if it is working correctly.
7. Look for mechanical issues: If the motor is making unusual noises or there is a vibration issue, it’s possible there is a problem with the mechanical components of the washer. If this is the case, it is best to call a professional for a proper diagnosis.
How long does a typical washer repair service take?
It depends on the specific problem, but typically a washer repair service takes 1-2 hours. However, it could take more time depending on the complexity of the problem and the availability of parts.
Do professionals provide warranties for their repair work?
Yes, many professional repair services provide warranties for their work. The type and length of the warranty will vary depending on the service and the customer’s specific needs, but warranties typically cover labor and parts for a certain period of time.
Can I prevent future washer issues with regular maintenance?
Yes, you can prevent future washer issues with regular maintenance. Regular maintenance can help keep your washer running smoothly and can alert you to potential problems before they become major ones. Regular maintenance can include checking hoses for blockages, cleaning the filter, checking the tub for build up, and running a cycle with a special detergent designed for washing machines.



Leave a Reply